
You know that unpleasant feeling? You're in the middle of an epic climb, breathing hard, and then... your water bottle is empty. Even worse, you realize that you should have thought about hydration long before leaving. After experiencing this hassle more often than I'd like (and seeing too many hikers in the same boat), I understood that stopping being thirsty and staying well-hydrated in nature requires more than just a simple water bottle in your pack. It's a whole system to master.
In the next few minutes, you'll discover the best options for carrying your water, hydration strategies that really work in the field, and most importantly, how to avoid classic mistakes that can turn a beautiful outing into a nightmare.
💧 Why Most People Get Hydration Wrong on the Trail
Let me tell you a story that stuck with me. Last summer, on Mont du Lac des Cygnes, I met a group dragging around a single 2-liter plastic bottle. One bottle for four people, in 28°C heat. Result? Two of them had to turn back halfway.
The classic mistake? Thinking that hydration is just "bringing water." In reality, it's much more complex:
- Quantity: you need 500ml to 1 liter per hour of effort depending on intensity
- Distribution: drinking regularly rather than in large quantities
- Accessibility: being able to drink without constantly stopping
- Temperature: cool water is better absorbed by your body
The thing is, your hydration system must adapt to your type of outing. A 2-hour walk at Parc du Mont Royal and a multi-day trek require completely different approaches.
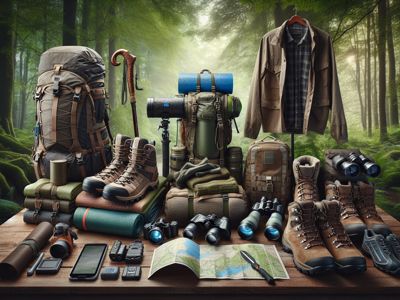
🎒 The 4 Water Transport Systems That Make All the Difference
After testing pretty much everything on the market (and making some costly mistakes), here are the four systems that are really worth it:
Hydration Pack: My Favorite for Long Outings
Why do I love this system? Simple: you can drink without slowing down, without shifting around, without even thinking about it. The tube stays within reach of your mouth, and it completely changes how you hydrate.
| Advantages | Disadvantages | Ideal for |
|---|---|---|
| Continuous hydration Weight well distributed High capacity (2-3L) | More complex cleaning Can freeze in winter Hard to gauge quantity | 4h+ hikes Mountain biking Trail running |
Water Bottles: Reliable and Versatile
Never underestimate a good old bottle. It's simple, it works, and you control exactly what you drink. My favorites? Stainless steel bottles to keep water cool, and collapsible bottles to save space on the return trip.
Filtration Systems: Total Freedom
This is the game changer for long adventures. Instead of carrying 4 liters of water, you carry 1 liter and resupply along the way. I use this approach on all my multi-day treks now.
- Pump filters: efficient but heavier
- Gravity filters: perfect for groups
- Filter straws: ultra-light for emergencies
- Purification tablets: essential backup
Insulated Bottles: For Extreme Conditions
In the middle of summer or winter, your water temperature makes a huge difference. Ice-cold water at 30°C or a hot drink at -15°C can literally save your outing.
🏔️ How Much Water to Bring Based on Your Type of Outing?
This is THE question everyone asks me. And the answer, as often in the outdoors, is: "it depends". But I can give you solid basics that I've tested in the field.
Short Outings (less than 3h)
For a walk like at Parc Michel Chartrand, 500ml to 1L is plenty. The important thing is to start well-hydrated and drink regularly.
Medium Hikes (3-6h)
Here, we're talking 1.5L to 2.5L depending on the season. On a trail like Mont Yamaska, I always start with 2L minimum in summer.
Long Hikes (6h+)
For big challenges like Hautes-Gorges de la Malbaie, you're looking at 3L+ or you plan resupply points.
| Duration | Summer (20-30°C) | Winter (-5 to 10°C) | Factors to Consider |
|---|---|---|---|
| 1-3h | 0.5-1L | 0.5L | Effort intensity |
| 3-6h | 1.5-2.5L | 1-1.5L | Elevation gain, exposure |
| 6h+ | 3L+ or filtration | 2L+ | Available water sources |
Get my gifts →
🌡️ Hydration Strategies That Really Work in the Field
OK, you have your transport system, you know how much to bring. Now, how to hydrate properly so your body performs at its maximum? Here's what I've learned after hundreds of outings.
The Rule of Small, Frequent Sips
Forget big gulps when you reach the summit. Your body absorbs water better in small, regular quantities. My trick? I drink 2-3 sips every 15-20 minutes, whether I'm thirsty or not.
Hydration Starts Before the Hike
It might seem obvious, but how often do you start dehydrated without realizing it? I always drink 500ml in the hour before departure. And I check the color of my urine (yeah, I know, it's glamorous): it should be pale yellow.
Adapt According to Weather and Effort
In hot weather, I go for cool water and add electrolytes. In winter, hydration is just as crucial but we often forget it. Dry, cold air dehydrates enormously.
- Hot weather: cool water + electrolytes, drink before getting thirsty
- Cold weather: lukewarm drinks, watch for freezing bottles
- High altitude: increase your consumption by 1.5x minimum
- Intense effort: 200-300ml every 15-20 minutes
⚠️ Hydration Mistakes That Can Ruin Your Outing
Let me share the blunders I've seen (and sometimes made) in the field. This will save you from hassles and maybe even dangerous situations.
Mistake #1: Relying Only on Natural Sources
Yes, drinking water from a mountain stream makes for good Instagram. But it's risky without proper filtration. I learned my lesson with a serious gastro after a weekend at Canyon Sainte-Anne.
Mistake #2: Neglecting Electrolytes During Long Efforts
Drinking only pure water for hours can cause hyponatremia (blood sodium dilution). Result? Cramps, nausea, confusion. Not fun in the middle of the mountains.
Mistake #3: Starting with an Untested System
Never, and I mean never, test a new hydration system on the day of a big outing. That leaking hydration pack, that filter that doesn't work, that bottle that gives a weird taste... test everything at home first.
Mistake #4: Ignoring Signs of Dehydration
Your body talks to you, listen to it. The first signs? Unusual fatigue, mild headaches, dark urine. At this stage, it's still recoverable. Wait for cramps and dizziness, and your outing is over.
« Dehydration reduces your physical performance by 10-15% from just a 2% loss of your body weight in water. »
🔧 How to Choose THE Perfect System for Your Needs
Now that we've covered the basics, how do you choose YOUR ideal system? It depends on your hiking style, budget, and priorities. Here's my 4-step method.
Step 1: Define Your Hiker Profile
The Sunday hiker: 2-4h outings, marked trails, not far from civilization. A good 1L insulated bottle does the job.
The regular adventurer: Varied outings, 2-8h, sometimes self-sufficient. Focus on versatility: 2L hydration pack + backup bottle + purification tablets.
The ultralight enthusiast: Every gram counts. Collapsible bottle + ultra-light filter + knowledge of water points on your routes.
The multi-day trekker: Maximum autonomy. Robust filtration system + large storage capacity + backup options.
Step 2: Consider Your Favorite Destinations
Do you mostly do Mont Arthabaska with family? No need for a military-grade filtration system. Exploring remote regions? Filtration becomes essential.
Step 3: Think Maintenance and Durability
A hydration system requires maintenance. Hydration packs must be cleaned after each outing. Filters have a limited lifespan. Plastic bottles degrade.
My advice? Start simple and evolve. A good steel bottle + purification tablets covers 80% of your needs to start.
🌲 Seasonal Hydration: Adapting Your Strategy
Each season in Quebec brings its hydration challenges. Your approach must adapt if you want to stay performing year-round.
Summer: The War Against Heat
This is the season when hydration becomes critical. At 30°C with humidity, you can lose up to 2-3L per hour of intense effort. My summer strategy:
- Early morning start with pre-chilled bottles
- 3L hydration pack + 1L insulated bottle
- Electrolytes in the pack, pure water in the bottle
- Regular breaks in the shade
Winter: The Forgotten Hydration
Big beginner mistake: neglecting hydration in winter. Dry air, body heating, intense breathing... you lose enormous amounts of water without realizing it.
Fall and Spring: The Treacherous Seasons
Changing temperatures, unpredictable weather... this is where a versatile system shines. Hydration pack + insulated bottle, to adapt to evolving conditions.
💡 My Concrete Recommendations After 15 Years on the Trail
Alright, enough theory. Here's exactly what I recommend based on your budget and needs, tested and approved on Quebec terrain.
The Beginner Setup ($50-100)
- 1L insulated bottle in stainless steel
- 1L collapsible bottle for backup
- Purification tablets (essential backup)
This covers 90% of your family or friend outings. Simple, reliable, economical.
The Intermediate Setup ($150-250)
- 2L hydration pack with insulated tube
- 750ml insulated bottle for hot/cold drinks
- Personal filter like LifeStraw
- Powdered electrolytes
My favorite setup for 80% of my outings. Versatile, comfortable, safe.
The Expert Setup ($300+)
- 3L hydration pack with heating tube (winter)
- Gravity filtration system for groups
- Ultra-light titanium bottle
- UV purifier for questionable water
- Various electrolyte salts
For serious adventurers who spend weeks in autonomy.
🎯 Action Plan: Start on Your Next Outing
OK, you now have all the keys to stop being thirsty and optimize your hydration in nature. But knowledge without action is worthless. Here's your concrete plan for the coming weeks.
This Week: Evaluate Your Current System
Look at what you already have. Does your basic water bottle work for your usual outings? Identify THE weak point: insufficient capacity? Water getting too warm? Difficult access?
This Weekend: Test in Real Conditions
Choose a trail you know well and test your hydration strategy. Note everything: quantity consumed, frequency, ease of use.
Next Month: Optimize and Invest
Based on your observations, adjust your setup. One purchase at a time: start with the element that would most improve your comfort.
You know what? Staying well-hydrated in nature is like learning to make fire or read a map. It seems complicated at first, then it becomes second nature. And once you master it, it completely changes your trail experience.
Here are the key points to remember:
- Hydration starts before the hike and is planned according to your type of outing
- Drink regularly in small quantities rather than occasional big gulps
- Adapt your system according to season, duration, and intensity of your adventures
- Always test your equipment before big outings
- Never forget electrolytes during prolonged efforts or in hot weather
Now, stop reading and go prepare your next outing. Your trails are waiting, and with a proper hydration system, you'll be able to enjoy them fully. Whether it's a family walk at Mont Royal or an epic adventure in the wilderness, you now have everything you need to stay hydrated and performing.
Happy trails, and don't forget: adventure begins with the first step... well-hydrated!
Newsletter
Content that makes you want to go outside
Every week, a trail idea, a reflection on nature, or a tip worth the detour. Zero spam. Only the essentials.
Joined by 12,000+ outdoor enthusiasts
Read next