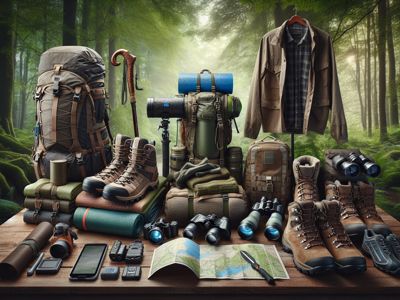

🥾 Why hiking poles will transform your hikes
Let me tell you a story. A few years ago, I was descending Mont du Lac des Cygnes with a friend who had been dragging his new hiking poles around since morning. I was gently teasing him: "Come on, we're not mountaineering!" Then, on a particularly steep and rocky descent, I slipped and found myself butt-first in the mud. Him? Stable as a rock with his two extra points of support. That's when I understood: tips for buying hiking poles are worth their weight in gold. Hiking poles aren't just for experienced hikers or those with knee problems. They're equipment that can literally transform your trail experience. Whether you're a beginner or veteran, exploring urban trails at Parc du Mont-Royal or tackling the challenges of the Hautes-Gorges, the right poles will accompany you for thousands of kilometers. In this guide, I'll share everything I've learned after testing dozens of different models and covering more trails than I can count.🤔 Do you really need hiking poles?
Excellent question! For a long time, I was in the "real hikers don't need poles" camp. What a mistake! After doing my own tests and observing thousands of hikers, here's what I discovered.Signs you should seriously consider poles
You feel knee pain after your hikes, especially on descents. Poles can reduce impact on your joints by 25 to 30% according to several studies. That's huge! You lack confidence on technical terrain. If wet rocks, roots, or steep slopes make you nervous, two additional support points will completely change your game. You carry a heavy pack. With a 15 kg pack or more, balance becomes more precarious. Poles help you maintain your center of gravity.
💡 Pro tip — Even if you're young and fit, try poles on a long hike (15+ km). You'll be surprised how much less tired you feel at the end of the day.
When poles become a game-changer
I've noticed that poles make the biggest difference in these situations:🛒 Essential criteria for choosing your poles
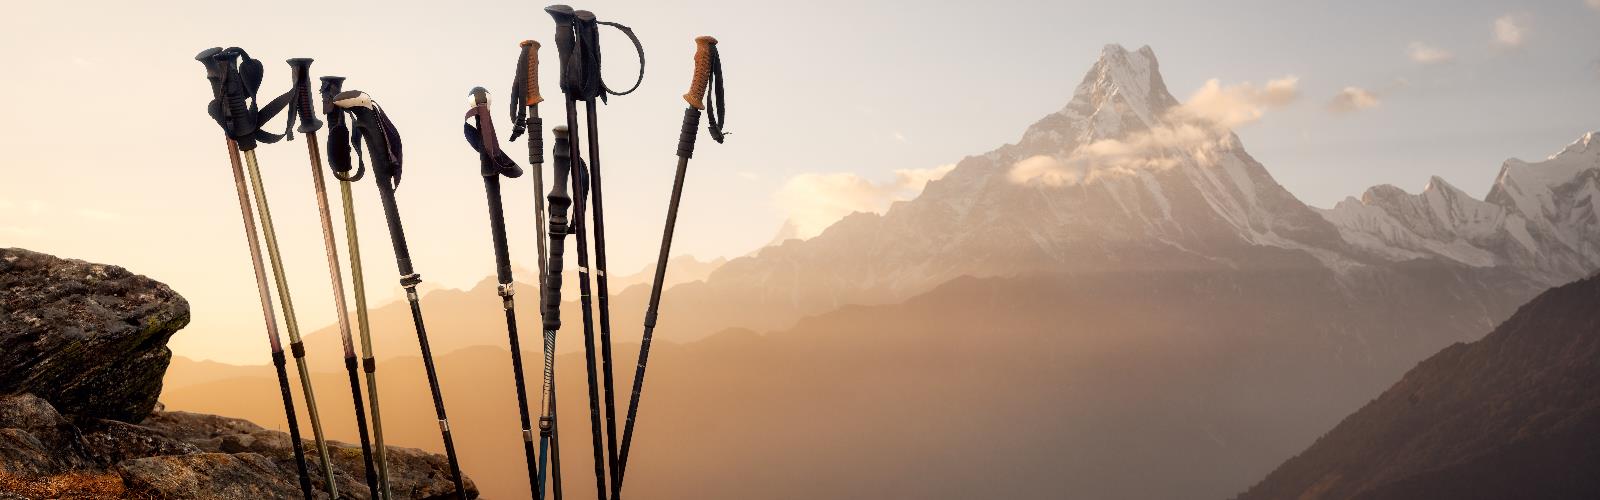
Now that we've established that poles can really improve your experience, let's talk about the tips for buying hiking poles that will make all the difference.The locking system: your best friend or worst enemy
This is probably the most important aspect and the one most people overlook. I've had poles collapse under me mid-descent - not fun! Twist-lock systems are reliable but can be laborious to adjust with cold gloves. Lever systems (flip-lock) are quick and efficient, but watch the quality - cheap models break easily. Twist systems are compact but can slip if poorly adjusted.
⚠️ Warning — ALWAYS test the locking system in-store by putting weight on it. A pole that retracts under pressure can cause a fall.
Materials: aluminum vs carbon
Aluminum is practically indestructible and cheaper. Perfect if you're starting out or hard on your equipment. The extra weight (generally 100-150g more per pole) is negligible for most hikers. Carbon is lighter and absorbs vibrations better, but costs more and can crack from violent impact. Ideal for long distances or if you count every gram.The grip: where you'll spend a lot of time
I've developed blisters with poorly adapted grips, so trust me, it's important! Cork grips are my favorites: they absorb moisture and become more comfortable over time. Foam grips are light and comfortable in hot weather. Plastic grips are durable but can become slippery when wet.| Grip type | Advantages | Disadvantages |
|---|---|---|
| Cork | Absorbs moisture, comfortable, durable | More expensive, can crumble over time |
| Foam | Light, good grip, economical | Degrades faster, less durable |
| Plastic/Rubber | Very durable, easy to clean | Can be slippery, less comfortable |
💰 How much to invest in your first poles?
Ah, the $100 question! Literally, in some cases. Let me guide you based on my experience with poles from all price ranges.Budget range ($50-100)
This is perfect to start! I had $60 Costco poles that followed me for hundreds of kilometers. They were heavier and less refined, but they did the job. If you're starting out and not sure you'll like hiking with poles, start here. What you can expect: Robust aluminum, basic but functional locking system, decent grip. Perfect for testing the waters.Mid-range ($100-200)
This is my recommended sweet spot for most hikers. You get a good balance between quality, durability and price. Brands like Black Diamond, Leki or REI offer excellent models in this range. What you gain: Lighter materials, more reliable locking systems, ergonomic grips, often removable straps.
💡 Pro tip — Buy your poles end of season (September-October) to take advantage of sales. I once found $180 poles on sale for $120.
Premium range ($200 and up)
For enthusiasts who rack up lots of kilometers. Ultra-light carbon, advanced technologies, extended warranties. Honestly, unless you do 50+ hikes per year, the extra investment isn't necessarily worth it.Where to buy: my recommendations
In-store: Mountain Equipment Coop (MEC), Sail, or your local outdoor store. The advantage? You can handle them, test the locking system, and get personalized advice. Online: Watch the sizes! Make sure you can return if it doesn't work. I once ordered poles that were too short - not practical for someone 6'2"!📏 How to properly adjust your poles
Having the best poles in the world is useless if they're poorly adjusted. I've seen too many hikers with poles too short or too long wondering why they weren't feeling the benefits.The 90-degree elbow rule
Basic position: Standing, poles in hand, your elbows should form a 90-degree angle when the tips touch the ground. That's your starting point. For climbs: Shorten your poles by 5-10 cm. This prevents you from raising your arms too high and gives you more pushing power. For descents: Lengthen your poles by 5-10 cm. You can plant the pole lower in front of you for better control.
📌 Good to know — On very technical terrain, don't hesitate to adjust your poles several times during the hike. The 30 seconds invested can save you hours of discomfort.
Straps: your secret to less fatigue
Most people use straps wrong! You shouldn't tighten the strap around your wrist like a bracelet. Pass your hand through the bottom of the strap, then grasp the grip AND strap together. This lets you release your grip without losing the pole.Basic technique that will change your life
Opposite rhythm: Left pole with right foot, right pole with left foot. It's natural, like when you swing your arms walking. Planting: Plant the pole slightly in front of you, not directly beside. On climbs, use them to push yourself forward. On descents, plant them in front to brake and stabilize yourself.🔧 Maintenance that will extend your poles' life
My first poles lasted 3 years because I neglected them. My current poles? 8 years and still like new! The difference? Minimal but regular maintenance.After each outing
Quick rinse: Especially if you walked in mud, sand or salt water. These elements can infiltrate mechanisms and cause corrosion. Complete drying: Extend your poles completely and let them dry before storing. Trapped moisture can cause internal rust.Seasonal maintenance
Disassembly and cleaning: Once or twice per season, completely disassemble your poles. Clean interior sections with a damp cloth. You'll be surprised how much dirt accumulates! Lubrication: A drop of light oil on locking mechanisms keeps them fluid. Avoid thick lubricants that attract dirt.
⚠️ Warning — Never force a stuck mechanism! If your poles are blocked after a muddy outing, let them soak in warm water before trying to adjust them.
When to replace tips
Rubber tips for asphalt wear out quickly if you do lots of urban trails. Metal tips last years but can dull on rocks. A good trick: always keep replacement tips in your pack. They weigh almost nothing and can save a hike.🎯 Accessories and bonus features
Once you master the basics, some accessories can really improve your experience. Here are the ones truly worth it in my opinion.Baskets and specialized tips
Snow baskets: Essential if you snowshoe or winter hike. They prevent your poles from sinking deep into snow. I learned this the hard way during an outing at Parc national des Hautes-Gorges! Rubber tips: Perfect for asphalt sections or sensitive rocks. Quieter too, which is appreciated on popular trails like Mont Yamaska.Storage systems
Foldable vs telescopic poles: Foldables are more compact for travel, but telescopics are generally more robust. Depends on your priorities. Backpack clips: Super practical when you want to free your hands to take photos or eat a snack. Most modern packs have them, otherwise you can buy them separately.
💡 Pro tip — If you camp, your poles can serve as posts for an emergency tarp or to hang your food. Versatility!
Modern features
Anti-shock systems: Some models offer internal suspension that absorbs impacts. Personally, I find it adds weight and complexity without major benefit, but some hikers with joint problems love them. Poles with integrated camera: Gadget or revolution? Still too early to tell, but the idea is interesting for content creators.🚫 Classic mistakes to avoid
After observing thousands of hikers and making my own mistakes, here are the most common traps when buying hiking poles.Mistake number 1: buying too cheap or too expensive
Too cheap: I've seen $30 poles that bent after three outings. The locking system was so weak they retracted under the hiker's weight. False economy! Too expensive: Conversely, spending $300 on your first poles is like buying a Ferrari to learn to drive. Start reasonably.Neglecting in-store fitting
Never buy poles without testing them! I've seen people order online and end up with poles impossible to adjust to their height. In-store, take time to:
⚠️ Warning — Beware of cheap "universal" poles. Often, they only adjust in a limited range and may not suit your morphology.
Forgetting essential accessories
Buying poles without replacement tips is like buying a car without a spare tire. Tips wear out and get lost. Make sure you have:Bad technique from the start
Many beginners plant their poles too far in front or lean too much on them. Poles should assist your walk, not replace it. If you feel unstable without them after a few outings, you're probably developing bad technique.🌟 My field-tested recommendations
After years testing different models on all terrain types, from urban trails to multi-day expeditions, here are my honest recommendations based on your hiker profile.For beginners: the quality-price ratio
$80-120 range: Look for established brands like Black Diamond Trail Ergo or Leki Makalu. Robust aluminum, reliable flip-lock system, comfortable foam grip. I've recommended these models to dozens of beginners and feedback is always positive. Essential features: 100 to 135 cm adjustment (covers 95% of hikers), removable straps, rubber tips included.For regular hikers: perfect balance
$150-220 range: This is where you find the best performance/price balance. The Leki Micro Vario or Black Diamond Distance FLZ are my current favorites. Lighter, more compact, more refined mechanisms. Why it's worth the investment: After 20-30 hikes per year, the extra weight and comfort really show. Higher quality mechanisms are also more reliable long-term.
💡 Pro tip — If you're hesitating between two models, choose the one with the better warranty. Good companies often replace defective poles without questions.
For ultralight and long distances
$250+ range: Ultra-light carbon, compact foldable systems. The Leki Micro Trail Pro or Black Diamond Distance Carbon FLZ. Every gram counts when you carry your gear 100+ km. Warning: Lighter = more fragile. These poles require more care and don't suit all hiking styles.My personally tested models
Currently in my pack: Leki Micro Vario Carbon (for 3 years). Light, reliable, comfortable. They've followed me from Mont Arthabaska to the Rockies. For winter: Black Diamond Expedition 3 (aluminum). Heavier but indestructible in cold weather. Plastic mechanisms can become brittle at -20°C.| Hiker profile | Recommended budget | Key features |
|---|---|---|
| Occasional beginner | $80-120 | Aluminum, flip-lock, foam grip |
| Regular 3-4 seasons | $150-220 | Light, reliable system, ergonomic |
| Enthusiast/Ultralight | $250+ | Carbon, compact, advanced technologies |
📥 Download our free gifts — The complete list of all essential equipment for your hikes, including the poles and accessories guide not to forget.
Get my gifts →
Get my gifts →
🏔️ Testing your poles: first steps
You have your new poles? Perfect! But before tackling the biggest challenges, let me give you some tips to start well.Start close to home
First outing: Choose a trail you know well, not too technical. The idea is to learn to use your poles without having to concentrate on navigation or terrain difficulties. Parc national du Mont-Saint-Bruno is perfect for this - well-maintained trails with some elevation. Moderate distance: 5-8 km maximum for your first time. You'll use your arms differently and they might be sore the next day!Learn the rhythm gradually
Don't expect to master the technique from the first outing. At first, your poles might seem cumbersome. That's normal! Nobody is naturally good with poles from the start. Week 1-2: Focus on basic rhythm (left pole with right foot) Week 3-4: Work on terrain adjustments Month 2 and more: Perfect advanced techniques
📌 Good to know — Some hikers prefer using one pole at first to gradually get used to it. It's an excellent approach if you feel overwhelmed with both.
Situations to practice
Flat terrain: Work your rhythm and coordination Gentle climbs: Learn to push with your arms Easy descents: Practice placement for stability Small obstacles: Roots, rocks, streams - how to adapt your techniqueWhen to set poles aside
Paradoxically, learning when not to use your poles is part of mastery! On certain technical passages where you must use your hands, you need to know how to store them quickly. Practice this transition on easy terrain.❄️ Seasonal considerations for your poles
Something I learned the hard way: not all poles behave the same according to seasons. If you plan to hike year-round, here's what you need to know.Winter challenges
Freezing mechanisms: At -15°C and below, certain locking systems become difficult to manipulate. Metal flip-locks are generally more reliable than twist systems in extreme cold. Snow baskets mandatory: Without them, your poles sink 30-40 cm into powder snow. Impossible to lean effectively! Make sure your poles accept standard baskets. Cold grips: Metal and plastic become uncomfortable in cold weather. Cork and foam stay "warmer" to the touch.
⚠️ Warning — Never force a frozen mechanism! Warm it gradually with your hands or bring your poles inside for a few minutes.
Summer adaptations
Straps and perspiration: In hot, humid weather, straps can become uncomfortable. Some hikers remove them completely in summer - it's a valid option if you master your poles well. Tips on hot rock: Rubber tips can soften on very hot rock. I once lost a tip that stayed stuck on an overheated granite slab!Seasonal transitions
Pre-season inspection: Before your first spring outing, check all mechanisms. Winter moisture may have caused internal corrosion. Winter storage: Clean and completely dry your poles before storing them. Extend them fully to prevent moisture from staying trapped.🎯 Summary: your next steps
There you have it! We've covered quite a bit of ground together (no pun intended!). Tips for buying hiking poles are actually less complicated than they seem once you understand the basics. Essential points to remember: • Start in the $100-200 range for good quality-price balance if you're serious about hiking • Always test in-store - locking system and grip comfort are crucial • Aluminum for beginners, carbon when you rack up lots of kilometers • Learn technique gradually on easy terrain before tackling challenges • Minimal maintenance will extend your poles' life by several years"The best hiking poles are the ones you actually use, not the ones that stay in the closet because they were too expensive or complicated."My final advice? Don't overcomplicate things. Decent quality poles, well-adjusted and used regularly will transform your trail experience. Whether you're exploring urban trails or planning your next trek to more exotic destinations, good poles will accompany you for thousands of kilometers of adventures. Next time you meet a hiker who mocks poles (like I used to!), smile and continue on your way. You now know what they're missing! And who knows, maybe one day you'll help them choose their first poles. Now it's your turn! Take time to shop around, test some models, and above all, go try them on your favorite trails. The most beautiful discoveries always await us outside, and with the right tools, every step becomes safer and more enjoyable.
Newsletter
Content that makes you want to go outside
Every week, a trail idea, a reflection on nature, or a tip worth the detour. Zero spam. Only the essentials.
Joined by 12,000+ outdoor enthusiasts
Read next