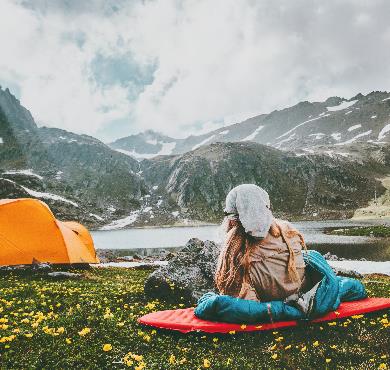

🔥 Why mastering the art of starting a fire can save your camping trip
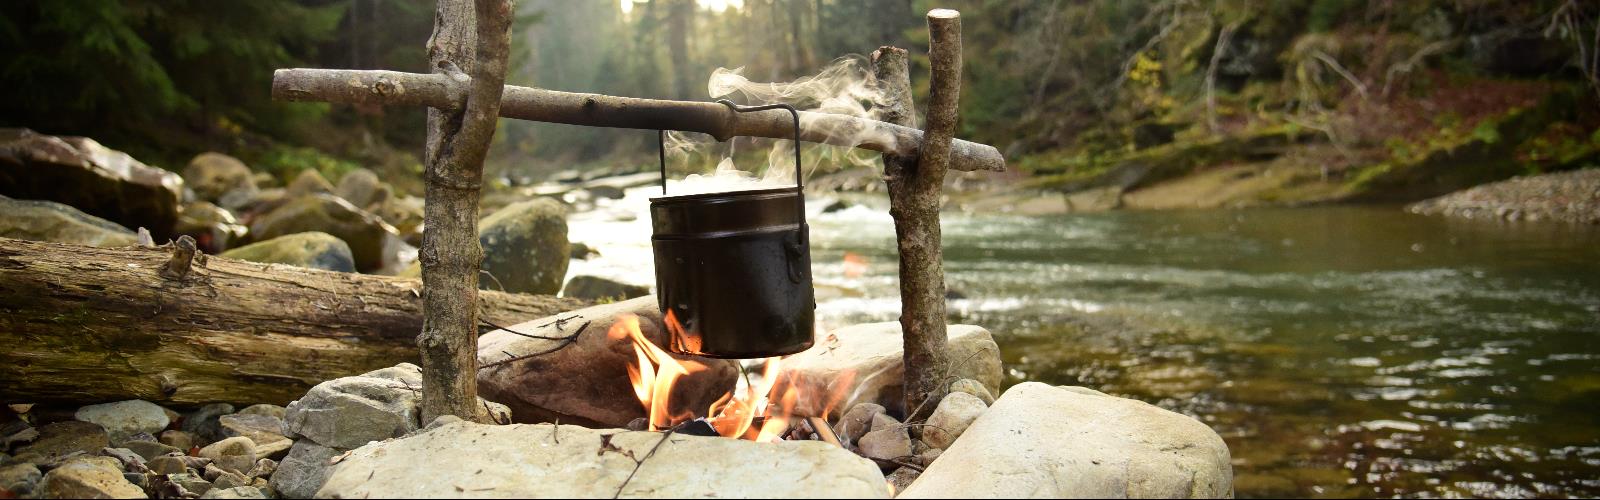
There's nothing like the crackling of a good campfire after a day on the trail. But between you and me, I've seen so many campers struggle for hours with their lighter and wet newspaper... It's pretty frustrating when all you want is to warm up and cook your dinner! After 15 years exploring Quebec's trails and sleeping under the stars, I've learned that starting a fire efficiently is an art that can be learned. With the right tricks, you can have dancing flames in just minutes, even in wet weather. In this guide, I'll share my 7 best tips for starting a fire every time, whether you're at Parc National du Mont Saint Bruno or wild camping deep in the woods. I've tested these techniques in all kinds of conditions, and they've never let me down.🌲 The secret to a good fire: understanding the three-size rule
Before diving into advanced techniques, you need to understand the foundation of every good fire: the three-size fuel rule. This is the basis of everything, and once you've mastered it, starting a fire becomes child's play.Tinder: your best friend in wet weather
Tinder is your starting material - the finest and driest possible. In Quebec's forests, my favorites are:- Birch bark: it burns even when wet thanks to its natural oils
- Dead conifer branches: those still attached to the tree
- Dry grass: particularly effective in autumn
- Open pine cones: full of flammable resin
💡 Pro tip — Always collect your tinder before starting your fire. I make it a habit to keep it in a waterproof pouch in my pack - it's saved me more than one rainy evening!
Kindling: the crucial transition
Kindling is what bridges the gap between your tinder and your large logs. We're talking about branches from pencil-thick up to thumb-thick. The mistake I see all the time? People skip this step and try to go straight to large branches. Result: the fire goes out.Fuel wood: for duration
Once your fire is well established, that's when you add your large logs. Start with branches the size of your wrist, then gradually work up to more substantial logs.🏕️ Tip #1: The bird's nest technique (foolproof even for beginners)
My favorite technique for beginners is what I call the "bird's nest." It's simple, effective, and works every time when done right. Here's how to proceed: 1. Form a nest with your finest tinder - imagine you're really building a nest for a bird 2. Place a match or your fire starter in the center of the nest 3. Surround the nest with your kindling in a tipi shape, leaving spaces for air circulation 4. Light the center and blow gently at the base to feed the flames
📌 Good to know — The secret of the bird's nest is air circulation. If your nest is too tight, the flames will suffocate. Too loose, and it won't catch. You need to find the right balance!
I've used this technique hundreds of times, notably during a memorable camping trip at Mont du Lac des Cygnes on a particularly humid evening. In 5 minutes, we had a fire that kept us warm all evening.
🔥 Tip #2: Homemade fire starter that will never let you down
Forget expensive commercial fire starters that aren't always effective. Here are my two homemade fire starter recipes that work in all conditions:Vaseline and cotton ball fire starter
This is my favorite for difficult conditions:Wood shavings and wax fire starter
For a more ecological version:| Fire starter type | Burn duration | Water resistance | Ease of making |
|---|---|---|---|
| Vaseline + cotton | 3-4 minutes | Excellent | Very easy |
| Shavings + wax | 8-10 minutes | Good | Moderate |
| Commercial fire starter | 2-3 minutes | Variable | None (purchase) |
⚡ Tip #3: The "top-down" method that revolutionizes everything
This is the trick that changed my camping life! Instead of building your fire from bottom to top like everyone else, you start from the top. I know, it sounds counterintuitive, but trust me. Here's the technique: 1. Place your largest logs directly on the ground, parallel to each other 2. Add a layer of medium logs perpendicular to the first ones 3. Continue alternating directions, decreasing size with each level 4. Finish with your tinder and kindling on top 5. Light from the top and let the fire burn down naturally The advantage? The fire burns more evenly and you don't need to constantly "feed" it. I discovered this technique during a trek in Charlevoix, and since then, it's my go-to method for long-duration fires.
⚠️ Warning — This method takes a bit longer to get started, but once going, it can burn for hours without intervention. Perfect for evenings when you just want to relax!
🌧️ Tip #4: Starting a fire in wet weather (the ultimate challenge)
Ah, starting a fire when everything is wet... This is where you separate the real campers from the rest! I've experienced this too often in the Hautes-Gorges de la Rivière Malbaie where downpours arrive without warning.Find the dry wood inside
Even after hours of rain, there's always dry wood somewhere:Prepare a dry platform
Before even thinking about your fire, build a dry base:The emergency "Swedish candle" technique
When everything is really soaked, my last resort technique: 1. Find a standing log (stump or trunk) 2. Make deep cross cuts on top 3. Stuff the cuts with tinder and fire starter 4. Light - the log will burn from inside out🏔️ Tip #5: The art of ventilation (why your fire always goes out)
If your fire constantly goes out, 9 times out of 10, it's a ventilation problem. Fire is like us: it needs oxygen to live!Understanding air currents
Always observe wind direction before building your fire. Position yourself so that:The natural bellows technique
When I was younger, I would blow like crazy on my nascent fires. Mistake! You can create a "natural bellows" that's much more effective:- Place a flat stone behind your fire to reflect heat
- Leave about 6 inches of space between the stone and flames
- Air will naturally circulate in this space and feed your fire
💡 Pro tip — If you must blow on your fire, do it at the base, not on the flames. And blow gently and consistently, not in little puffs that will scatter your tinder everywhere!
🎒 Tip #6: Equipment that makes all the difference
After years of experience, I've identified the tools that truly transform the fire-starting experience. No need for survivalist equipment, just the right basics.Fixed blade knife: your best friend
Forget the little Swiss Army knife for preparing your wood. A good 4-5 inch fixed blade knife will:Compact hatchet: for the heavy work
If you plan to make fires regularly, invest in a small hatchet. It's a game-changer for:Redundant ignition kit
I always have at least 3 different ways to light a fire:🌟 Tip #7: Safety first (and how to properly extinguish your fire)
The last tip, and perhaps the most important: a good camper leaves no trace of their passage. This includes ensuring your fire is completely extinguished and your site is clean.The complete extinguishing technique
Extinguishing a fire is more than just pouring water on it: 1. Let burn the wood until only embers remain 2. Douse thoroughly with water - you should hear the "pshhh" of steam 3. Stir the ashes with a stick to expose hidden embers 4. Douse again until everything is cold to the touch 5. Test with your hand a few inches away - you shouldn't feel any heatRespecting the environment
When I camp in places like Canyon Sainte-Anne, I always make sure to:
⚠️ Warning — Always check fire restrictions before leaving. Some parks completely prohibit fires during high forest fire risk periods.
"A poorly extinguished fire can smolder for hours and reignite with wind. Never take chances - if it's not completely cold, it's not out."
📥 Download our free gifts — The complete list of everything you need for a perfect campfire, including lighting techniques and essential safety rules.
Get my gifts →
Get my gifts →
Choosing the right location from the start
Safety starts before lighting the first match:Summary: your 7 tips for starting a fire every time
There you have it! You now have in your arsenal the techniques that have never failed me in 15 years of camping. To summarize:- Master the three-size rule - tinder, kindling, fuel wood in the right order
- Use the bird's nest technique - simple and effective for beginners
- Prepare your homemade fire starters - vaseline + cotton for difficult conditions
- Try the top-down method - for long-duration fires without maintenance
- Adapt to wet weather - find dry wood and create a dry platform
- Understand ventilation - oxygen is your fire's friend
- Prioritize safety - a properly extinguished fire and clean site
Newsletter
Content that makes you want to go outside
Every week, a trail idea, a reflection on nature, or a tip worth the detour. Zero spam. Only the essentials.
Joined by 12,000+ outdoor enthusiasts
Read next