
You're coming back from your first summer hike, still on cloud nine, when suddenly you spot an animal that seems in bad shape on the trail. Your heart sinks — what to do? This situation, more common than you'd think, requires knowing things about animals in distress to react appropriately. Between the urge to help and the risks to your safety, there's a margin you need to know how to navigate. After 15 years spent on trails across Quebec and elsewhere, I've encountered my share of animals in difficulty, and I've learned that good intentions can sometimes cause more harm than good.
🐻 How to recognize an animal truly in distress?
The first thing to master is distinguishing an animal that really needs help from normal behavior that we misinterpret. I've seen too many hikers panic over an "abandoned" fawn when its mother had simply gone to find food. Real signs of distress include:- Visible injuries: bleeding, broken limbs, open wounds
- Abnormal behavior: animal going in circles, seems disoriented, doesn't flee at your approach
- Respiratory distress: excessive panting, difficulty breathing
- Trapped animal: caught in a fence, trap, or debris
- Truly abandoned young: baby animals alone for several hours in an exposed location
🚨 Your safety first: golden rules before intervening
Before even thinking about helping, you need to assess the risks. An injured animal is unpredictable and potentially dangerous, even if it seems harmless. My personal rule? I never approach closer than 10 meters to an animal in distress, period.| Type of animal | Minimum distance | Main risks |
|---|---|---|
| Small mammals (squirrels, groundhogs) | 3-5 meters | Bites, possible rabies |
| Birds | 2-3 meters | Beak strikes, scratches |
| Cervids (deer, moose) | 20+ meters | Hoof kicks, charges |
| Carnivores (foxes, lynx) | 15+ meters | Bites, diseases |
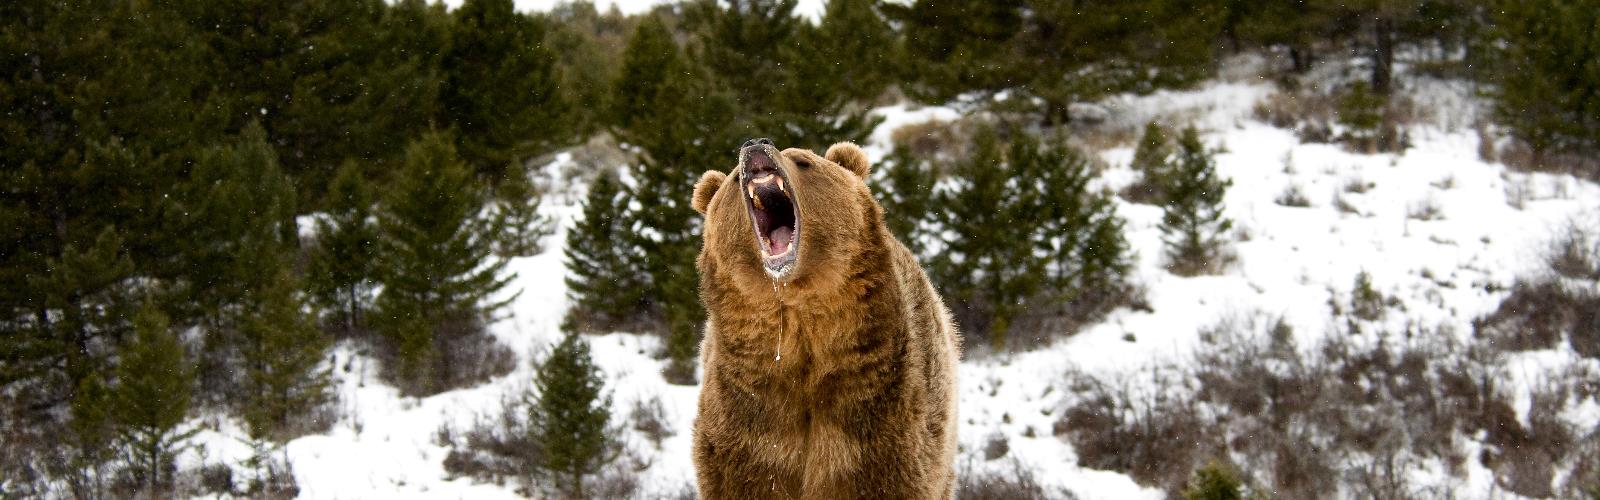
| Bears | 100+ meters | Fatal attack |
📞 Who to contact and when: the wildlife emergency network
When you confirm that an animal is truly in distress, your first action should be to contact the right people. In Quebec, we're lucky to have a solid network for this kind of situation. Here are your emergency contacts, in order of priority:- SOS Poaching: 1-800-463-2191 (24/7, provincial service)
- Local park warden: if you're in a national or provincial park
- Local animal protection society
- Wildlife specialist veterinarian: for telephone advice
- 911: as a last resort, for extreme situations
🛠️ Concrete actions you can take while waiting for help
While you wait for professionals, there are some safe actions you can take to help the animal without putting yourself in danger. The idea is to minimize additional stress and prepare for the specialists' intervention.Securing the perimeter
Your first mission: prevent other hikers from approaching. Position yourself upstream on the trail and inform people coming. Most are understanding when you explain the situation. If possible, ask someone to do the same on the other side.- Stay visible but at a safe distance from the animal
- Speak calmly to other hikers
- Avoid sudden movements and loud voices
- Note the time and discreetly document the situation (photos from a distance)
Limited direct intervention
In certain very specific cases, you can act directly: Animal stuck in debris: If it's a small animal (squirrel, bird) stuck in something simple to remove, you can try to clear the obstacle without touching the animal. Use a stick or branch. Animal on the road: For an injured animal on a busy road, you can try to direct it to a safer place by positioning yourself on the road side (never between the animal and the forest).What you absolutely must not do
I've seen well-intentioned hikers worsen the situation through ignorance. Here are the mistakes to avoid:- Giving food or water: can worsen certain conditions
- Trying to move the animal: risk of worsening injuries
- Making noise to "wake up" a motionless animal: it may be in shock
- Taking a young animal home: it's illegal and often unnecessary
- Using flash to photograph: additional stress
🏥 After the intervention: follow-up and prevention
Once professionals have taken over, your role isn't completely finished. There are some follow-up steps that can be useful for the animal and for the hiking community.Situation follow-up
If you gave your contact information to the agents, they'll sometimes contact you for follow-up. Otherwise, you can call a few days later to know the outcome. This information is valuable for understanding patterns and improving future interventions. I kept in touch with the agents who intervened for the Mont Yamaska deer. The animal was treated and released in a safer area. Knowing that you contributed to saving a life gives special meaning to our nature outings.Responsible information sharing
If you share your experience on social media or with other hikers, do it in an educational rather than sensationalist way. Focus on good practices rather than the drama of the situation.Prevention for your next outings
This experience can help you better prepare your future hikes. Add wildlife emergency numbers to your contacts, review the essential questions to ask yourself before leaving, and consider taking a wilderness first aid course. Some areas are higher risk: transition zones between habitats, migration periods, areas near roads. At Parc national des Hautes-Gorges de la rivière Malbaie, for example, wildlife encounters are frequent, especially late in the day.🌱 Understanding our impact on local wildlife
Beyond emergency situations, we need to understand that our presence in nature has an impact on animals. The more aware we are of this impact, the less likely we are to create distress situations.Human causes of animal distress
Unfortunately, several animal distress situations are related to our activities:- Abandoned waste: plastics, fishing lines, containers
- Feeding: makes animals dependent and aggressive
- Disturbance of nesting sites: too-close photos, noise
- Unleashed dogs: stress for wildlife, chasing
- Poorly done wild camping: attracting animals to our sites
Adopting a preventive approach
"The best intervention with an animal in distress is the one you don't need to do because you anticipated it."Some simple gestures that make a huge difference:
- Respect recommended distances (even for photos)
- Keep your dog on leash in sensitive areas
- Take back all your waste, even organic
- Avoid nesting areas during critical periods
- Use established trails rather than creating new passages
Get the guide →
🎒 Wildlife emergency equipment to have in your pack
After several interventions, I've developed a small specific kit for wildlife emergencies. Nothing heavy or complicated, but a few items that can make the difference when needed.The basic kit
| Item | Use | Weight |
|---|---|---|
| Satellite phone (or beacon) | Off-network communication | 200-300g |
| Powerful whistle | Scare or signal | 20g |
| Extra headlamp | Emergency lighting | 80g |
| Sturdy gloves | Indirect handling | 50g |
| Survival blanket | Create visual barrier | 60g |
Optional items depending on the area
For certain zones or specific seasons, I add:- Bear spray: mandatory in certain parks
- Light binoculars: safe distance observation
- Paracord rope: to free a trapped animal
- First aid app: for real-time advice
Conclusion: Being a responsible hiker facing wildlife
Knowing how to react when facing an animal in distress is a skill that goes beyond simple first aid. It's a question of respect toward the nature that welcomes us on its trails. Key points to remember:- Your safety comes first — an injured hiker helps no one
- Distance and observation — often, not intervening is the best intervention
- Emergency contacts — always have the right numbers in your phone
- Prevention — most situations are avoidable with good practices
- Continuous learning — each situation teaches you something for next time
Newsletter
Content that makes you want to go outside
Every week, a trail idea, a reflection on nature, or a tip worth the detour. Zero spam. Only the essentials.
Joined by 12,000+ outdoor enthusiasts
Read next