
You know what struck me after 15 years of hiking Quebec's trails? It's not so much the equipment that makes the difference between a memorable outing and a nightmare, but rather how to gear up like a pro by making the right choices from the start. I've seen so many hikers dragging 40-pound packs for a 2-hour walk, or heading out in shorts and t-shirts at 5°C because it was sunny in the parking lot!
Let me share my field tricks for gearing up efficiently, without breaking the bank or turning into a hiking mule. You'll discover how to choose the essentials, avoid marketing traps, and especially how to adapt your gear according to your actual outings — not the ones you dream of doing someday.
Get my gifts →
🎯 Where to start when you want to gear up intelligently?
The first mistake I see constantly? Starting by buying the biggest possible backpack "just in case". My advice: start by defining your real needs. Do you mostly do 3-4 hour walks near Montreal? No need for the setup to cross Gaspésie!
Here's my 3-step method that I developed after testing hundreds of products:
- Analyze your current outings: average duration, season, distance from parking
- Identify your 3 priority needs: comfort, safety, or performance
- Invest first in the "big 3": shoes, pack, layering system
I learned this the hard way by buying a 65L pack for my first hikes at Parc National du Mont Saint-Bruno. Result? I looked like a sherpa for a 2-hour walk!
🥾 What are the truly essential pieces of equipment?
After testing pretty much everything sold in stores, here's my list of essentials — in order of importance:
| Equipment | Why it's crucial | Beginner budget |
|---|---|---|
| Hiking shoes | Comfort, safety, injury prevention | $120-180 |
| Suitable backpack | Weight distribution, organization | $80-150 |
| Layering system | Temperature regulation, safety | $100-200 |
| Hydration | Performance, safety | $20-40 |
| Sun protection | Sunburn/heat prevention | $30-60 |
What took me years to understand: better to have 5 quality pieces than 15 mediocre gadgets. My basic setup today fits in a 25L pack and follows me everywhere, from Canyon Sainte-Anne to the Chic-Chocs.
Shoes: your #1 investment
Honestly, if you could only buy one thing, it would be good shoes. I've seen too many beautiful outings ruined by blisters or twisted ankles. For beginners, look for:
- Ankle support: mid-cut model minimum
- Vibram sole: reliable grip on wet rock
- Waterproofing: Gore-Tex or equivalent for our humid autumns
- Perfect fit: 1cm of space for toes, heel that doesn't move
My trick for trying them on: go to the store at the end of the day when your feet are a bit swollen, like after a hike. And don't hesitate to check out our complete guide to the best shoes for beginners.
💰 How to avoid marketing traps and buy smart?
It always makes me laugh to see ads with hikers climbing Everest to sell a water bottle! Reality: 95% of your equipment must be adapted to your local outings, not Himalayan expeditions.
My golden rules for buying smart:
- Ignore "ultra-technical" marketing: if you don't do mountaineering, you don't need an $800 jacket
- Prioritize versatility: one piece that works 3 seasons is better than 3 specialized pieces
- Test before investing: rent or borrow for big purchases
- Buy off-season: winter gear in March, summer gear in October
A concrete example: this "3-in-1" jacket for $400 that I bought 5 years ago. Great on paper, but in practice? The outer shell is too warm alone, the fleece liner not warm enough, and together it's too bulky. I should have taken a versatile softshell for $150!
Real bargains vs false economies
After testing gear from all price ranges, here's where you can save without risk:
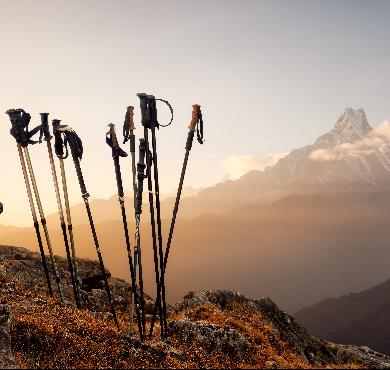
- Trekking poles: $40-60 models do the job as well as $150 ones
- Water bottles: a classic Nalgene often beats "premium" models
- Technical underwear: Costco sells excellent ones at a fraction of the price
However, never skimp on:
- Shoes: your feet will thank you
- Backpack: your back too
- Rain jacket: being soaked is dangerous
🏔️ How to adapt your equipment according to Quebec seasons?
Ah, Quebec seasons! From -30°C to +35°C, with everything in between... Your equipment must be as versatile as our weather is unpredictable. Here's how I organize myself after having frozen, sweated, and tested everything in between!
Spring: the season of surprises
Quebec spring is 15°C in the sun and snow in the shade. My essentials:
- Modular 3-layer system: technical t-shirt + fleece + windbreaker
- Convertible pants: long in the morning, shorts in the afternoon
- Gaiters: for residual snow and mud
- Light crampons: Yaktrax type for icy sections
My advice for preparing your first spring outing? Check out our guide on how to prepare your first spring hike in Quebec.
Summer: managing heat and insects
In summer, my priorities change completely:
- Light long-sleeved clothing: UV and mosquito protection
- Hat with neck protection: guaranteed sunburn otherwise
- Merino wool socks: anti-odor and moisture wicking
- Double hydration: 1L water + electrolytes for 4h of walking
A recent discovery: permethrin-treated clothing against insects. Game changer for outings to Mont du Lac des Cygnes where black flies are merciless!
Fall and winter: the art of layering
Fall is my favorite season but the trickiest for equipment. A morning at 2°C can become an afternoon at 18°C:
| Temperature | Base layer | Insulating layer | Outer layer |
|---|---|---|---|
| 10°C to 15°C | Technical t-shirt | Light fleece | Windbreaker |
| 0°C to 10°C | Wool underwear | Thick fleece | Softshell |
| -10°C to 0°C | Merino wool | Packable down jacket | Hardshell |
For winter, I add: snowshoes, serious crampons, thermos, and always a spare layer in the pack. Better to be too warm than risk hypothermia!
🎒 What's the pro method for organizing your pack?
You know what separates an experienced hiker from a beginner? It's not so much what they carry, but how they organize it in their pack. After emptying my pack 50 times looking for my sunglasses, I developed a system that saves me time and energy.
My 3-zone rule:
- Easy access zone (side pockets + top): water, snacks, map, glasses
- Main zone (center of pack): extra layers, lunch, first aid kit
- Bottom zone: emergency gear, spare layer, rarely used items
Optimal weight according to duration
Here are my references after thousands of kilometers on trail:
- 2-4h outing: maximum 8-10% of your body weight
- Full day: 10-15% of your body weight
- Multi-day hike: 15-20% maximum
For a 70kg person, that's a 5-7kg pack for a beautiful day at Parc de la Montagne des Roches. Heavier, and you'll feel it in your knees on the descent!
Safety essentials (without paranoia)
I'm not the type to drag a complete pharmacy, but these items have already saved me:
- Compact first aid kit: bandages, ibuprofen, tensor
- Whistle: 3 blasts = universal distress
- Emergency blanket: $2 and it can save a life
- Headlamp + spare batteries: even for day outings
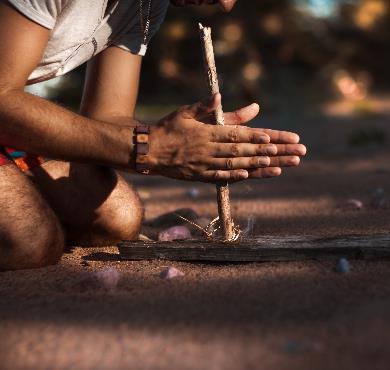
- Waterproof fire starter: just in case...
To learn more about safe preparation, check out our guide to essential questions to ask yourself before leaving.
🔧 How to maintain your equipment so it lasts?
It breaks my heart to see hikers throw away $200 boots after one season because they don't know how to maintain them! With minimal care, your equipment can last for years. Here are my old-timer tricks:
Shoes: your best allies
After each outing:
- Remove mud immediately: warm water and a soft brush are enough
- Remove insoles: let them dry separately
- Stuff with newspaper: absorbs moisture and keeps shape
- Air dry: never on a radiator or in direct sun
Once per season, I apply a waterproofing treatment suitable for the material. My Salomon boots are 4 years old with hundreds of kilometers, they're still like new!
Technical clothing: preserving properties
Technical fabrics are fantastic... when you know how to care for them:
- Wash in cold water: preserves fibers and treatments
- Technical detergent: Nikwax or equivalent, no fabric softener
- Gentle drying: air dry or dryer on minimum temperature
- Reactivate waterproofing: gentle heat with iron or dryer
My Gore-Tex jacket is 6 years old and still repels water like the first day. The secret? I wash it after every 4-5 outings and reactivate the DWR treatment twice a year.
"The best-maintained equipment is the one you use most often. Take care of your gear, it will take care of you in the mountains!"
🚀 Ready to level up?
There you have it, you now have all my secrets for gearing up like a pro without breaking the bank! Let's recap the essential points:
- Start with your real needs: analyze your current outings before buying
- Invest in the "big 3": shoes, pack, layering system
- Adapt according to seasons: versatility and modularity are your allies
- Organize your pack intelligently: 3-zone system and optimal weight
- Maintain your equipment: it will pay you back a hundredfold
What really matters isn't having the most expensive or most fashionable equipment. It's having the right equipment for YOUR outings, well-maintained and intelligently organized. With that, you can set off on adventures with complete confidence!
Now, stop shopping and go test your setup on a beautiful trail! I suggest a little outing to Parc du Mont Arthabaska to start — perfect for validating your equipment without too much risk.
And don't forget: the best equipment is the one that makes you want to get outside. So gear up, but most importantly... go play outside!
Newsletter
Content that makes you want to go outside
Every week, a trail idea, a reflection on nature, or a tip worth the detour. Zero spam. Only the essentials.
Joined by 12,000+ outdoor enthusiasts
Read next